|
fs
OPTICS
With all the advances in camera technology, image quality still comes down to the optics you use. Get the best glass you can afford. A good lens will last a lot longer than the latest camera. Since I have Canon equipment, I buy all Canon L-Series lenses. The L-series are the pro lens and they make a difference.
When I first started with a digital SLR, I did not have L-Series lenes. While I was able to take many quality photographs, there were times when I struggled with the lower quality lenses. Lower quality lenses tend to be slower, so they may not be usable in certain low lighting conditions. Also, additional distortion is usually visible in the less expensive lenses. |
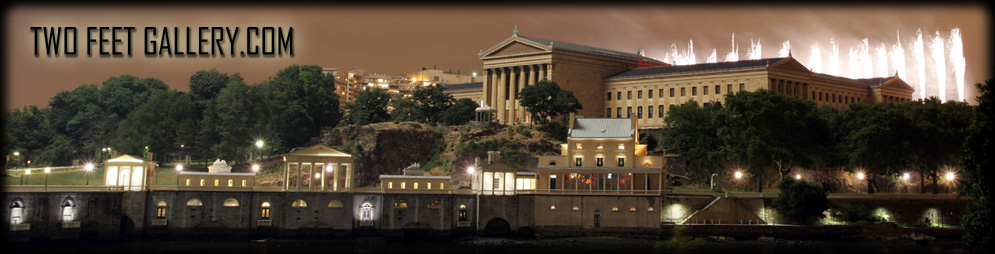
Poor Optics
|
|
Observe the distortion on the buildings. Due to the poor optics, all the buildings point to the center. Certainly some distortion will occur with a wide angle lens, but the excessive distorition here is unnecessary.

|
Filters
While many digital photgraphers will apply a large variation of effects to an image once its on the computer, I prefer to manipulate my images as little as possible. I still find the best way to get the best image is to capture it properly the first time. By usaing filters, you can have the best of both worlds. Indeed, some effects couldn't be captured without them.
While there are many choices for filters, the two I tend to use the most are polarizers and neutral denistity filters.
Polarilzers Filters
 |
Colors can be enhanced and glare can be removed by the use of a cicular polarizing filter. By turning the filter into the position that cuts the glare the most, images are improved.
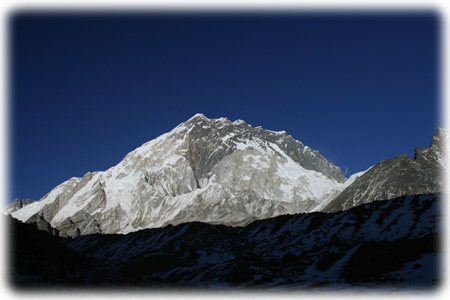
Observe to the left, the rich deep blue sky just before sunset. While the sky was certainly blue, it was not that blue. Also observe how the whites are not muted at all. Note that this effect increases as you increase in altitude.
Polarizers are an essential filter, don't leave home without it.
|
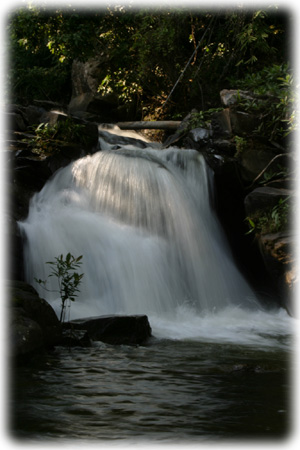
Neutral Density Filters |
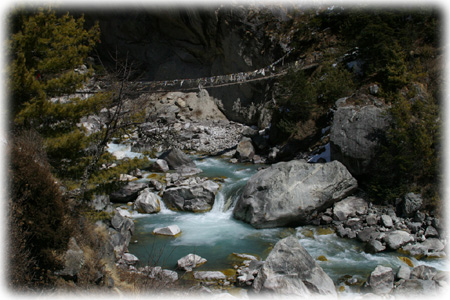
Sometimes, there's just too much light. Observe the waterfall below and compare it to the waterfall on the right. Notice the pleasing motion blur in the photo on the right? As long as there isn't too much light, one can accomplish this by leaving the shutter open a little longer. For the image on the right I used about 1/20th of a second. However, if I tried that with the image below, the bright sun would have over exposed the photo, even with the aperture set to 22.
A solution to this problem is to use a neutral density filter. These filters block out light and come in different degrees of darkness. Obviously the darker the filter the less light will hit the sensor/film and therefore the slower shutter speed you can use.
|
 |
Not all neutral density filters are colored consistantly across the entire filter. Graduated neutral density filters are made to darken only a portion of an image. The mountain sunset shown above is a perfect example of this. If I had a graduated neutral density filter with me for that shot, I could have exposed the ground to more light and the mountain and sky to less light. Thus giving a more balanced lighting to the entire image. |
|
|
Copyright 2004, Jeff Salvage
|
|